• Hey Trainers! Be sure to check out Corsola Beach, our newest section on the forums, in partnership with our friends at Corsola Cove! At the Beach, you can discuss the competitive side of the games, post your favorite Pokemon memes, and connect with other Pokemon creators!
  • Due to the recent changes with Twitter's API, it is no longer possible for Bulbagarden forum users to login via their Twitter account. If you signed up to Bulbagarden via Twitter and do not have another way to login, please contact us here with your Twitter username so that we can get you sorted.

Unovia's Heartgold Gift, Event, & Trade (G. E. T.) Challenge

Log #21-Eusine, Chuck, & Getting Shuckie
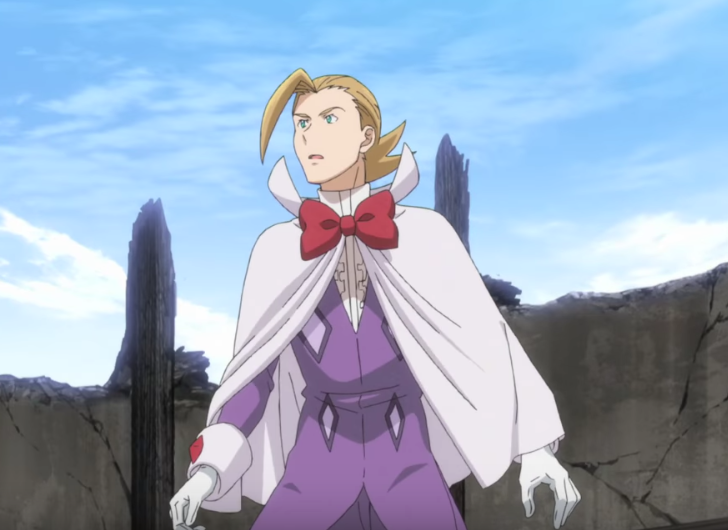
  • Upon arriving at Cianwood, the first thing I did was get the Secret Potion for Amphy. That is why I was there, after all! With the bag of medicine safely with me, I decided to go north and check out the rest of the island. There is a cave here, though I can't do anything with it yet, so I walked to the extreme north, where Suicune was waiting for me! It jumped around, then sped off. A man came up to me, reintroducing himself as Eusine. He was the guy from the Burned Tower with Morty.
    Eusine.png


    He told me he had been chasing down Suicune for 10 Years, and had been insulted to see that Suicune was interested in me. Did I insult his honor or something? He isn't an old timey southern gentleman. Anyway, he believed that Suicune would watch the fight and upon him winning, Suicune would see him as worthy, despite the fact that Suicune had just left. Anyway, I had to take the delusional man on. In the Gen II games, he was known as Mystery Man. He opened with Drowzee, which I easily took down, to which he changed to Electrode. Electrode is fast, and I had to switch my team around to beat it, due to the super accurate Thunder attacks! WTF! He gets accurate attacks! Anyway, eventually (I think Espeon took it down), Espeon finished his Haunter. Defeated, Eusine turned around and left just as quickly as he came. Strange man, wearing a cape. Moving on.

    Wanting a Ampharos, I decided to train in the water, getting my team to Level 30 finally. Cianwood has a MAJOR Tentacool and Tentacruel problem! No wonder people don't readily or easily come there! The one good thing about the Tentacruel is that they give a lot of experience for training. Once I had my team ready to go, I took on the Cianwood Gym, since it was the only major thing left to do on the island directly.
    Chuck.jpg


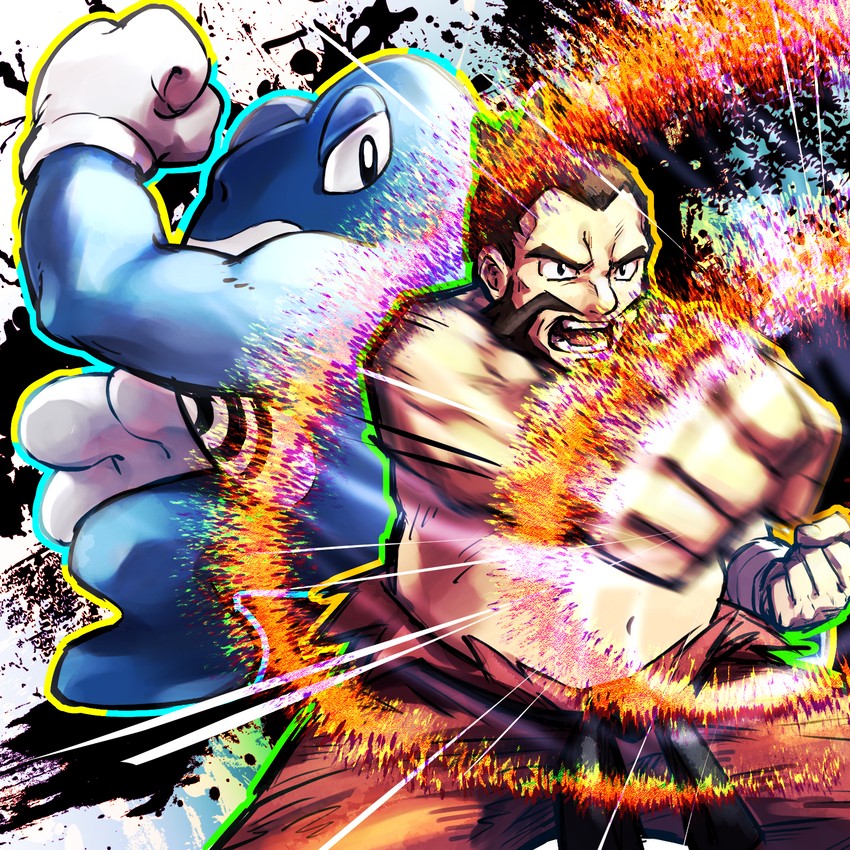
    Chuck is a Fighting type Gym Leader. For this fight, I decided to have Espeon and Togetic as my main battlers, with Ampharos as my backup, especially for the Poliwrath. The Gym was unique, requiring me to face down all of his trainers to get access to the switch to stop the waterfall pouring over Chuck's head. Espeon and Togetic easily dispatched the trainers, leaving Chuck still under the waterfall. One movement of the waterfall later and an angry Chuck took me on! I opened with Togetic because Espeon had gotten a lot of experience battling the trainers and he opened with Primeape. I am just surprised that Chuck only has 2 Pokemon and that they are KANTO Pokemon, with no Johto ones included. That is strange.

    Anyway, Primeape attempted to set up using Double Team, but Extrasensory took it down with no issue. He sent out Poliwrath in response. Poliwrath can be a nightmare if you are asleep or paralyzed, since it can use Dynamic Punch, an absolutely devastating move. Dynamic Punch fails if the opposing Pokemon is faster. I switched to Ampharos, which dodged the Hypnosis, then just kept Thunder Punching its way to victory over Chuck. Fifth Badge down!

    Upon leaving the Gym, a woman came up to me and introduced herself as Chuck's wife. She gave me Fly as a reward for winning, then said Chuck was too chubby and needed to work out. I then headed off to get Shuckie. Unfortunately, there is no Krabby for Voltorb trade here. I think it is in Olivine.
    213Shuckle_OS_anime.png

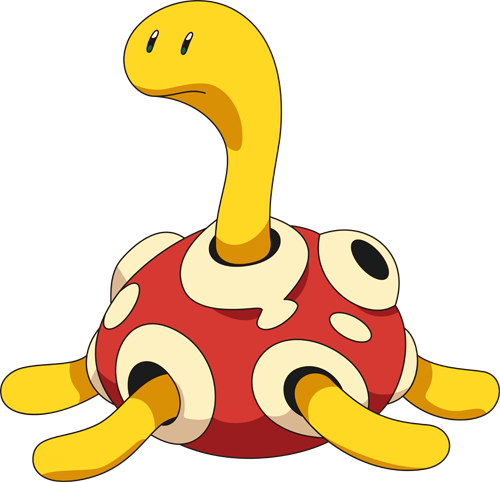
    The trainer that owns Shuckie was apparently attacked by Silver, who stole his other Pokemon. The Gold and Silver games state that the other Pokemon was Sneasel. The trainer gave Shuckie to me for safe keeping. Shuckle is a defensive tank, with the highest defense of any Pokemon. Unfortunately, Shuckie has no good level up moves, so I am going to travel with Shuckie until I get to Mahogany Town. Then I will travel back to Cianwood and drop it off again.

    In the next log, we will head back to the Lighthouse and drop off the medicine. Until then, we will see you!
     
    Log #22-Heading Back To The Lighthouse & Jasmine
  • This is a quick update.
    I wasn't sure I would be able to give Togetic Fly, but as soon as I figured out I could, I gave it to it. Then, I flew to the Glittering Lighthouse, where I gave the Secret Potion to Amphy, healing it. I got the call from Baboa, saying the Safari Zone was open and inviting me to come check it out. Instead, I continued to Route 42, where I ran into Suicune and Eusine, who was still on its tail. There is a grove of Apricorn Trees, from which I took all of them.

    I think I will take a few days and do a bit of walking with Shuckie. The plan is to spend a few days between Azalea Town and Goldenrod City, getting the Apricorn Balls done and going to the Radio Tower, getting more points from Buena's Password. I have 8 Points right now, and I know if I get 30 points, I can get Buena's phone number. I listen to Buena early in the morning, so I should be able to get a few more points, finish my set of Apricorns, and clear the Apricorn Box for a bit.

    In the next Log, we will check out the Safari Zone, which is in that cave near Cianwood that we did not attempt before. Until then, see you!
     
    Log #23-Cliff Cave & Safari Zone
  • I still have some Apricorns in the Apricorn Box, but I have decided to move on. Actually ran into Raikou for the first time. I have run into Entei a few times. Anyway, I flew to Cianwood so I could explore the Cliff Cave area (Routes 47 & 48) which lead to the Safari Zone. This is one of the hardest areas in the game, especially since there are a few double battles in the area, including one who has a Magmar and Electabuzz (which I skipped for now) and the infamous innuendo Cloyster & Onix.

    After I got through there, I met with Baboa, who asked me to take the Safari Zone Owner Test. The first part is to catch a Geodude, which I easily did. The next part, which will come later, is capturing a Sandshrew. The grass of Route 48 is a great location to train up. I will not be training Shuckie. Instead, I will train my team to Level 33 before I go after Jasmine. Shouldn't take too long. There are Tauros that give a lot of Experience, along with many other Pokemon that give quite a bit of Experience.

    There are 3 things I will do before I battle Jasmine.
    1. Finish my Apricorns & Buena's Passwords for those times I am finishing my Apricorns.
    2. Train up to Level 33 in the Route 48 grass.
    3. Take on that Magmar & Electabuzz team.

    In the next Log, we will be facing Jasmine. Until then, we will see you!
     
    Log #24-Jasmine
  • Before I went after Jasmine, I got my team up to Level 32, battled the Magmar & Electabuzz double team, then flew to Olivine City, getting ready to take on Jasmine. Olivine Gym is an empty room with no challengers other than the Gym Leader. I often consider Olivine Lighthouse part of the Olivine Gym, especially considering that you defeat the Lighthouse to get to Jasmine. However you consider it, it is tme to take her on.

    Jasmine.jpg


    On to the battle with Jasmine. She opened with her first Magnemite (Lv. 30), which Quilava (Lv. 32) easily beat down with Flame Wheel. Jasmine immediately tried to shut me down by bringing Steelix (Lv. 35) out. In response, I switched to Sudowoodo (Lv. 32), kinda nervously, especially considering Steel can beat Rock Types. Luckily, Sudowoodo was able to use Low Kick to drop Steelix down to under half health, though Steelix used its Sitrus Berry to recover some health. It then used Iron Tail, which almost took Sudowoodo out. Hanging on, Sudowoodo hit again with Low Kick, dropping Steelix under a third. Steelix used Rock Throw which made Sudowoodo almost faint. Luckily, Sudowoodo had quick Claw, which allowed Sudowoodo to move faster, edging out Steelix to take it down.

    Now up against a wall, Jasmine sent out her second Magnemite (Lv. 30), to which I switched back to Quilava. Quilava once again OHKO Magnemite, winning me the 6th Badge. Before I move onto the next point, I will spend a few days to finish my To Do List, then go to the Lake of Rage, a trip I have been ignoring until now. See you soon!
     
    Log #25-Catching the Red Menace
  • With my team leveled up to Level 34, I headed to Mahogany Town. My radio turned to the Mysterious Transmission that plays while in Mahogany Town currently. Pushing north, eventually I reached the Lake of Rage. This area is nearly always raining, making Electric Type moves more effective, meaning the player has to be careful with using Electric moves. Swimming out on Lapras, I came upon Gyrados.

    Lake of Rage.jpg


    The Gyrados is red and a shiny, the first shiny ever intentionally placed into the game. It took me four tries to get the Gyrados.

    Try 1: I opened with Ampharos, used Thunderpunch, thinking I could whittle it down, but ended up killing it (OHKO).
    Try 2: I opened with Ampharos again, used Discharge, which OHKOed it
    .
    Try 3: I opened with Sudowoodo, used Rock Slide, which dropped the Gyrados low enough to catch. I then used Lure Balls (I had 8), and ended up using all of them, catching it on the 8th one. Knowing I could do better, I tried again.
    Try 4: I opened with Ampharos and Thunderwaved it, paralyzing the beast. Switching into Sudowoodo, I used Rock Slide, almost OHKOing Gyrados. It was left with a sliver of red health. I then chucked Lure Balls at it, catching it on my 6th one.


    After I caught it, I named it Red Menace to differentiate it from other Gyrados. With it in the box, I also got the Red Scale from the water. Flying to Cherrygrove, I exchanged the Red Scale for the Experience Share. I wish the Gen 4 one was like the one for later Gens. Anyway, I flew back to the Lake of Rage, where I red headed man named Lance and his Dragonite met me.

    Lance_anime.png


    He congratulated me for my battle with the Gyrados, then invited me to join him in Mahogany Town to inspect the mysterious shop in the town, then flew off. I am itching to meet him there. Right now, I am going to train up Red Menace to the rest of my team (it comes in at Level 30), then I will join Lance. In the next Log, we will join Lance to investigate the shop. Until then, see you!
     
    Last edited:
    Log #26-Investigating the Suspicious Shop
  • 220px-Mahogany_Town_PG.png

    With my team ready to go, I joined Lance at the shop in Mahogany. Dragonite hyper beamed the shop owner. That is violence in a Pokemon game. Shame on you Lance! He revealed a staircase down to the Team Rocket HQ. This area was once a ninja base, but all of that changed when Team Rocket took it over. Lance and I split up to take down the HQ. This place is full of challenges, from the Persian Statues to the Game Show Floor of Death, to the massive amount of Grunts. This place has it all.

    It is a good idea to train up your team using all of the grunts and the wild Pokemon on the trap floor. Don't worry, you can always leave to heal up your team as needed. Through beating the Grunts, you find that there are two passwords to the electric doors you see all over the place. Those are Slowpoketail and Raticatetail. Once you get them, you meet with your first Rocket Executive of this quest... Petrel.

    Petrel.jpg


    Once you beat Petrel, he tells you that the overall password is Hail Giovanni. A Murkrow is in the room with him, which escapes to open the door to the Generator Room. As you follow Murkrow, beating Grunts as you go, eventually you run into another Executive, Ariana, who joins with a Grunt for a double battle.

    Ariana.png


    Don't worry, Lance is there to join in with the battle. Once you foil their plot, Ariana and the rest of Team Rocket leaves. You join in with Lance to free up the Electrode who are the power of the Generator.

    220px-Team_Rocket_HQ_PG.png


    Beating the Electrode frees them, and Lance gives you Whirlpool as a reward, then asks about your future, finally departing. With the shop liberated, we leave as well. We are now free to challenge Pryce finally. In the next Log, we will do so. See you then!
     
    Log #27-Pryce & Taking Shuckie Back
  • Before I battled Pryce, I dropped off Shuckie off at his owner in Cianwood, then flew back to Mahogany to battle Pryce.

    Pryce.jpg

    I hate ice puzzles, though his was not too bad. I like the ability to think through the process and being able to reset as needed. The trainers were not too bad, though being able to reach them required being the puzzles. When I finally got to Pryce, the challenge was to beat him due to the fact that he could stall out using rest to heal up his Dewgong. My Sudowoodo and Gyrados managed to edge him out, giving me the 7th Badge of Johto.

    Upon leaving the Gym, I got a phone call from Professor Elm, asking me about the Radio and Team Rocket. Oh boy, looks like I won't be doing Buena's Passwords until I stop them, so in the next Log, we will finally stomp out Team Rocket. See you then.
     
    Log #28-We Interrupt This Normal Radio Broadcast
  • Desiring to get Buena's Passwords back on the air, and knowing a strong dislike for Team Rocket, I traveled to Goldenrod. Thinking quickly, I went into the underground, since there is a Team Rocket Grunt that will give you a Team Rocket uniform. Nice! Moving into the Radio Tower, I tried to sneak up the stairs, when Silver stopped me and broke my disguise. Thanks dude! Now I have to battle all of the Grunts. Luckily, my team managed to crush them all. As the Grunts piled up, I got the notice that I had to get through to the Director, who was Petrel.

    Petrel.jpg


    Not him again! I crushed him, then he gave me the Card Key, giving me the ability to hunt down the real Director, who is in the Underground. Heading there, more Grunts and a battle with Silver awaited me. The battle with Silver was okay except for his Feraligatr, who posed a bit of a challenge. I had a automated door puzzle which was a tricky challenge, but eventually I got through there, rescuing the Director, who gave me a Card Key.

    319px-HeartGold_SoulSilver_Proton.png


    Upon getting the key, I headed back to the Goldenrod Tower, where I saw a ghost from the past, Proton, who I last battled at the Slowpoke Well. After shoving him aside, I found my way to the elevator that would take me to the Observation Deck. Before I did that, however, Ariana met me again.

    Ariana.png


    I had to battle her without Lance, and she was a bit of a challenge. After some struggle, she fell, leaving one more challenge...whoever waited in the Observation Deck.

    Archer.jpg


    I was introduced to the last Admin, Archer, who took over for Giovanni when Giovanni departed. Archer only had 3 Pokemon, and his most challenging one was Houndoom, who fell after a bit of a struggle. With that, Team Rocket was defeated once and for all. Hard to know if their message reached Giovanni, though their boss never showed up to challenge me. With the Radio Tower freed, I left as a hero to Johto.

    What am I going to do now? I think I am going to hunt down and capture Entei and Raikou. Once they are cpatured, I can move onto the Kanto Region in peace, not worried about the Beasts waiting for me to come back. In the next log, we will be going after them. The hunt awaits!
     
    Log #29-Hunting Down The Legendary Beasts
  • 243Raikou_OS_anime.png
    555px-244Entei_OS_anime.png
    Oh boy. Here we go! The most difficult hunt down in all of the Johto games. It is really hard for most players to do, since both Entei and Raikou will roar unless they are blocked in. Many players will use Haunter/Gengar to lock the two Beasts in. It also takes a while to rein them in because they are erratic. Sudowoodo was my tricky Pokemon. It has the move Block.


    I ran back and forth until I could get them to go where I wanted. Both Beasts use Pressure, which forces more uses of a move. I slowly lowered the HP of both. You could tell they were frustrated that they could not escape, though they would often use Roar to get away. I was even able to Paralyze Entei. Entei and Raikou would even show up on bodies of water. I had a ton of Fast Balls (thanks Kurt!) which I could throw at Raikou (Raikou is the faster of the two), and I made sure to have a lot of Ultra Balls through the Poke Mart.

    Where did I pin them down? Route 42 & Route 43. They were both caught through low HP and Ultra Balls. They have both been caught, and now I can fly through Johto with no worries.

    I actually did it! Woohoo! I am now able to move onto Ice Path & eventually Blackthorn City! In the next log, we will go through Ice Path. See you then!
     
    Log #30-Sliding On The Ice To Blackthorn City
  • Traveling down Route 43, I battled all of the trainers, who were not much of a challenge, especially considering the challenge ahead. Ice Path is a very difficult ice puzzle, mainly because you have to have Strength. Luckily, Sudowoodo was able to take that on, and there are no trainers, thank goodness. Part of the difficulty with the Ice Path is the rocks that you have to strength into holes. Sudowoodo to the rescue again! I had to use the walkthrough to get me through it, so here is the link to it.


    Once I got past the rocks, then the next challenge was getting to the Kimono Girl and freeing her. She is the last one. Once she was freed, I passed onto Blackthorn City, where an ace trainer met me, impressed at my accomplishment.

    In the next Log, we will go after Clair, which will be a tough fight. See you then!
     
    Log #31-Clair & The Dragon's Den
  • The Blackthorn City Gym is a tough one to take down. For this playthrough, it was the toughest I have experienced yet. The puzzle is bad because the directional movements are hard to set properly without messing up a few times. Also, the trainers are very tough to take down, a great prequel to the battle with Clair. I should have taken it as a note to take a step back and train up a bit. I was Level 38, and I thought it wouldn't be too hard. Boy, was I wrong.

    HeartGold_SoulSilver_Clair.png


    The battle with Clair took me two tries. Try 1: I beat Gyrados with Ampharos, then she moved to her Dragonairs, which my Red Gyrados were able to beat, but was paralyzed, leaving me in a tougher situation than I would have thought. She sent out Kingdra. Kingdra is VERY HARD TO TAKE DOWN! Why?

    230Kingdra_OS_anime.png


    In Generation 4, Kingdra is only weak to Dragon Type moves. There are no Fairy types in Generation 4. You might think you can get a Dragon Type to train up easily. WRONG! You can't get a Dragon Type in your team until AFTER this battle, in the Dragon's Den. So Fairies don't exist, and Dragons can't be gotten before this fight, so how can you move forward? You need to have very tough moves against Kingdra, and the best moves could be either Electric or Ice, but neither type are easy to inflict damage on Kingdra, since it is defended against both weaknesses due to its typing. That means that any moves are neutral damage. Kingdra swept my team brutally.

    Try 2: Before I tried again, I leveled up in the grass near the Safari Zone (and checked out Routes 45 & 46) to Level 40. When I felt ready, I opened with Sudowoodo to beat Gyrados using Rock Slide. It went down very easy. Kingdra came out in response. I saw each of my team members fall to the crazy thing. Luckily, my Typhlosion managed to Lava Plume it in the last effort to beat it down. As a result, I had to sack off Typhlosion to revive Gyrados, who had Ice Fang. Then I had to just use a few Hyper Potions & Moo Moo Milks to stall while I used Ice Fang to beat down the two Dragonairs. I very nearly lost this fight.

    Even though I had beaten Clair, SHE REFUSED TO CONCEDE AND GIVE ME THE BADGE! That forced me to "prove my worth" at the Dragon's Den. I got out my Lapras (Level 34) and gave it Whirlpool, beating the Dragon Tamers in the Den and getting to the Dragon Elder. The Elder asked me a few questions about how I felt about Pokemon, then gave me a Dratini.

    147Dratini_OS_Anime_3.png


    Depending on your answers, you will either get one with Extreme Speed (like I did), or not. The better one is the one with it, and I named it Speedy. I also caught another one that I could train to a Dragonair for a trade for a Dodrio. Speedy (Level 15) will be trained up to a Dragonite. Here we go again...sigh. If you watched my "Pokemon Yellow Professor Oak's Challenge", you will remember that it took me FOREVER to get a Dragonite.

    Flying to New Bark Town, I got a Master Ball from Professor Elm, who then told me the Kimono Girls were looking for me. Looks like I am going to train up my team a bit before I go to the Ecruteak Dance Theater, since the battle is a 5 battle in a row type situation. See you all later!
    After I got my Dratini, I flew to
     
    Log #32-Gym Leaders In Review: Johto
  • In this Review, we will be grading the Gym Leaders of Johto (and eventually Kanto). The grade will be out of 12. 3 Points for Gym Puzzle, 3 Points for Gym Trainers, 3 Points for the Gym Leader, and 3 Points for Sportsmanship. Let’s get started.
    Falkner.jpg

    Falkner:
    Gym Puzzle: The Puzzle was very improved from Gen II, moving away from the simple room to the elevated platform walkway. I like the fact that there are also walk around paths if you choose not to battle the Gym Trainers, though often at this point, it is a good thing to battle them anyway, since the experience and money never hurts. It’s more creative than difficult, but I like more creative Gyms. 2 out of 3.

    Gym Trainers: Pretty standard trainers. Not too interesting, though it is the first Gym of the Region. 1 out of 3.

    Gym Leader: Falkner is a bit disappointing, mainly because his team is notably lacking Johto Pokemon. He could have had a Hoothoot. Also, I must ask, how old is Falkner? The fact that he “borrowed Pokemon from his father” is a strange thing, especially considering he looks old enough to have gone on his own journey. Plus, the only threat is Pidgeotto, and that is only because he can do stall tactics. Major disappointment, even for a first Gym in the Region. 1 out of 3.

    Sportsmanship: Despite the fact that he is disappointed with his loss, he still acts humble in defeat, giving the badge as a sign of victory. 3 out of 3.
    Score: 7 out of 12

    Bugsy.png

    Bugsy:
    Gym Puzzle: The Puzzle was a bit fun and I would call it challenging, at least a little. The fact that you have to make both the red and blue ribbons go down to get to Bugsy on the last pathway is interesting. Not too challenging, but it makes you have to think about the switches. 2 out of 3.

    Gym Trainers: Why is it that the Gym Trainers have better Pokemon in some cases than the Gym Leader? One has a Beedrill! Still, they are pretty standard Bug Catchers. Easy to take down, and don’t really prepare you for what the Leader is like. 1 out of 3.

    Gym Leader: Bugsy is a disappointment. His Scyther can be tough, and is an effective wall, especially since it now has the much better U-Turn instead of Fury Cutter, like it had in Gen II. Once Scyther is bested, Bugsy has no defense. It would have been better and more of a threat if he had a Butterfree and a Beedrill along with the Scyther. Would have been a 1 out of 3 if it wasn’t for the improved Scyther. 2 out of 3.

    Sportsmanship: Shocked that he lost, but he understands he has much to learn. 3 out of 3.
    Score: 8 out of 12

    Whitney.jpg

    Whitney:
    Gym Puzzle: Pretty interesting, though the biggest challenge was trying to figure out where all of the openings went. You could easily get lost if you were not careful. 2 out of 3.

    Gym Trainers: The trainers were good training for Whitney, which is more than I could say for the first 2 Gyms. Not too tough, but could wear you down if not ready for them. 2 out of 3.

    Gym Leader: What can I say about Whitney? Having two Pokemon actually suits her, though I might have included a Nidorina, like she had in the Anime. Clefairy was more of an annoyance than anything else, though the Cute Charm ability could pose a challenge if activated. The Miltank is a beast! Level 20, with a very tough moveset. It also has a Lum Berry! A Lum Berry this early in the game is insane! Lum Berries can’t even be found in the wild, so how did she get one? If you don’t play the cards right, you can get swept by it! 3 out of 3.

    Sportsmanship: Cried after losing, forcing the player to step away then come back and get the badge from her afterward. 2 out of 3.
    Score: 9 out of 12

    Morty.jpg

    Morty:
    Gym Puzzle: Loved this one in Gen II, when it was a dark pit on the floor, and I loved it even more in Gen IV. It is exceedingly challenging, especially with the candle going out, setting you in complete darkness. 3 out of 3.

    Gym Trainers: They were not too difficult at all, though given that they can be a problem due to the pitch blackness of the Gym, it was pretty good. 2 out of 3.

    Gym Leader: Morty was a bit disappointing. All he had was the Gastly line. Could have had a Misdreavus in the team as well. A Gastly, 2 Haunters, and a Gengar. Seriously? Gengar is a fast beast and is a hard hitter, but other than that, his team is weak. 2 out of 3.

    Sportsmanship: He was gracious in defeat and acknowledged that I was the “Chosen One” that the Kimono Girls were after, so there is that. 3 out of 3.
    Score: 10 out of 12

    Chuck.jpg

    Chuck:
    Gym Puzzle: I like this one, mainly because it was inventive and unexpected. A massive improvement over Gen II. It had a neat design and premise. 3 out of 3.

    Gym Trainers: Not tough at all, especially if you have the right types for the Gym, which you most likely will at this point have at least a Flying type if not a Psychic type. 1 of 3.

    Gym Leader: Chuck was pretty disappointing, especially since he only had 2 Pokemon, which at this point, shouldn’t be. He was also dependent on Dynamic Punch, Status Conditions, and your team to be slow. That is not a real strategy. 1 out of 3.

    Sportsmanship: He was honorable, understanding and accepting his loss. 3 out of 3.
    Score: 8 out of 12

    Jasmine.jpg

    Jasmine:
    Gym Puzzle:The rating for this Gym Puzzle is dependent on what you consider the Puzzle. Olivine Gym is an empty room, with the only battle being the battle against Jasmine. The simplistic nature of it gives the puzzle a score of 1 out of 3. However, if the Olivine Lighthouse is considered as the Gym Puzzle, then this bumps it up to a 2 out of 3. The Olivine Lighthouse is a very challenging trial, forcing the trainer to fight through all of those challengers to get to Jasmine. I tend to consider the Olivine Lighthouse part of the Gym itself, so this is rated 2 out of 3.

    Gym Trainers: Once again, there are no trainers in the Gym outside of the Gym Leader, so we count the trainers in the Olivine Lighthouse. 2 out of 3.

    Gym Leader: Jasmine is a lot like Bugsy and most of the other Gym Leaders in that she has a really strong Pokemon (Steelix) being guarded by weaker Pokemon (2 Magnemite). Steelix is really difficult to take down mainly because of its bulky nature. Given the right moves and types, the battle isn’t too bad. 2 out of 3.

    Sportsmanship: She understands and accepts her loss. 3 out of 3.
    Score: 9 out of 12

    Pryce.jpg

    Pryce:
    Gym Puzzle: The puzzle is an ice puzzle, making you slide and hit the blocks to open up the next door. I have always hated ice puzzles, but other than being challenging and making you think, it is okay. 2 out of 3.

    Gym Trainers: Were not too hard. The hardest part was reaching them all due to having to beat the puzzles to reach them. 2 out of 3.

    Gym Leader: Pryce was not too hard. His Pokemon are equal to Jasmine. The toughest Pokemon he had was Dewgong, only because of the resting and healing. Pryce was an expert in the stall. 2 out of 3.

    Sportsmanship: A man of honor, Pryce gave the badge willingly. 3 out of 3.
    Score: 9 out of 12

    HeartGold_SoulSilver_Clair.png

    Clair:
    Gym Puzzle: Easily the most difficult Gym Puzzle in all of Johto. The sliding pieces and the directional arrows make for a very challenging one. 3 out of 3.

    Gym Trainers: The Gym Trainers were difficult, surprisingly, and were an early warning sign about Clair. 3 out of 3.

    Gym Leader: Many fans argue about who is tougher, Whitney or Clair. Whitney is tough for her stage of the game, while Clair is tough because the player does not get access to Dragon Type Pokemon until AFTER her battle. That Kingdra is a freaking tank that is hard to take down, even with types that should impact it (sorry, no Fairies this Gen!), and even with strong hits, the beast can just dish out incredible damage. It requires your entire team to take it down, and for me, two tries. 3 out of 3.

    Sportsmanship: None at all. Doesn’t recognize your win, forcing you to go to the Dragon’s Den, speak to the Elder, get a Dratini (which hopefully has Extreme Speed), all before she will give you the badge. Has some serious anger issues. At least Whitney cries then after some coaxing, gives you the badge. Clair sends you on a side quest for a type that you should have had access to before the fight. 1 out of 3.
    Score: 10 out of 12
    Total Score (Out of 96): 70

    Johto Gym Leader Total Rankings:
    GymPuzzleTrainersLeaderSportsmanship
    12113
    22123
    32232
    43223
    53113
    62223
    72223
    83331
     
    Log #33-Ecruteak Dance Theater
  • Kimono Girls.jpg

    Flying to Ecruteak to meet with the Kimono Girls (my team is still levels 40-41), I am surprised when who should back out of there but Silver. Silver was easily beaten by the Kimono Girls, and is even notably shaken from the encounter. He is so embarrassed by the loss that he runs away so he "doesn't have to watch me win". Steeling my resolve, I walked slowly into the Dance Theater, where the Kimono Girls beacon me up to the stage. The battle begins!

    Zuki
    Zuki was first met in Violet City. She was the one to give you the Togepi Egg. She opened with Umbreon, and I opened with Sudowoodo. Sudowoodo fought hard, but eventually fell to Umbreon. Thinking quickly, I changed out to Ampharos, who outsped the Umbreon.

    Naoko
    Naoko was first met in Ilex Forest. She was the one that needed to be shown how to get out. A klutz with direction. She opened with Espeon, as did I. The two Espeons faced each other down. Luckily, my Espeon had Headbutt, which made hers flinch until it fainted.

    Miki
    Miki was met when you had to save her from a Team Rocket Grunt. Don't know why I had to, considering she has a Flareon. Espeon continued to fight on my side, while her Flareon battled for her. Flareon was bested by Espeon.

    Sayo
    Sayo was the last one you meet in the main story, having appeared in the Ice Path. She was trapped on the ice because her sandals were stuck. She opened with Jolteon, who took out both my Espeon and my Ampharos due to the speed boosts. Typhlosion eventually edged out Jolteon.

    Kuni
    Kuni was met during the Rocket Takeover of the Radio Tower. I don't know why she didn't just join forces with you to take down the Rockets, though I am sure she battled some. I opened with Gyrados against her Vaporeon. You might think that it is a bad match, but I was able to flinch hers to the point it fainted. This was the last battle of the five. For winning the battle, I was given the Clear Bell and was encouraged to join them at the top of the Bell Tower when a Mysterious Pokemon landed. It was speculated to be Ho-Oh.

    In the next log, we will climb the Bell Tower and meet with the Legendary Phoenix, Ho-Oh! See you then!
     
    Log #34-Ho-Oh
  • Bell Tower.png


    Now is the time to go up to witness the great Phoenix, the great Creator of the Legendary Beasts, Ho-Oh! It is very challenging to go up the 9 stories to get up to the roof, where hopefully Ho-Oh will appear. The Kimono Girls ran there, they must know how to get there. Lucky them. I had to use a walkthrough video to get me there, as it winds around a lot, and there are many directions you can take. As long as you figure out the "up" ladders, you will be able to get there to meet the bird.

    Once I got up to the roof, the Kimono Girls were there indeed. They danced, the Clear Bells chimed, and Ho-Oh came down from the sky.

    600px-250Ho-Oh.png


    The Legendary Phoenix cried, then I engaged it in battle. Just to see if it would work, I threw a Fast Ball. When that failed (I expected as much!), Ampharos paralyzed Ho-Oh, then managed easily to get the HP down to red. Ho-Oh luckily missed a lot of its Fire Blasts, having resorted to Sacred Fire. Ampharos went down, Gyrados went down, and Sudowoodo went down, and still it wasn't captured. Luckily I had gone into this battle with 22 Ultra Balls, 14 Fast Balls, and I still had the Master Ball (just in case!). 17 Ultra Balls later, over half my team dead, and eventually, Ho-Oh was weak enough to catch.

    The Legendary Phoenix was captured, and I bid goodbye to the Kimono Girls. I will take a few days, level up my team, then continue through the journey. I was debating whether or not to put Espeon in the box and take Ho-Oh to the League, but I think I will handle it the other way around.

    By the end of my training, my team should be:
    Sudowoodo (Level 50)
    Ampharos (Level 50)
    Typhlosion (Level 50)
    Espeon (Level 50)
    Gyrados (Level 50)
    Togetic (Level 50)


    After all of that training (should be a few days), I will go through Routes 27, Tohjo Falls, & Route 26. That will get me to Victory Road and allow me to take my first steps into Kanto. We have almost made it to Kanto Folks!

    The Next Logs:
    Log #35-First Steps Into Kanto
    Log #36-Victory Road
    Log #37-Pokemon League: First Round


    That's right! Just 3 More and we begin the Kanto part of the Quest! Woohoo! See you for the First Steps Into Kanto in a few days.
     
    Log #35-First Steps In Kanto
  • Tohjo Falls.jpg

    Well, looks like I am doing this one a bit earlier than expected, but turns out my Pokemon (Level 42) are good enough to take my first Kanto steps, so I thought I would train against the many Ace Trainers here. Plus, it seems that the Kanto grasses have stronger Pokemon than even the Johto Safari Zone, so I will take some time, level up now, and then move into the Victory Road the next Log as planned.

    First flying to New Bark Town, I Surfed through the water, arriving on Route 27, where I am met by this guy who welcomes me to Kanto. I was a bit hesitant going into the nearby cave past him because I thought I would need Waterfall and Whirlpool before I passed through Tohjo Falls. Turns out I only needed Waterfall, so I decided to go up the waterfall and pass through Tohjo Falls. Leaving the cave, I arrived on Route 26, where a huge bridge and a bunch of Ace Trainers awaited me. Eventually I beat them all, but not without some healing. Lucky for me, there is a healing house close to the end of the route, so I was able to use their services to heal up, then battle some more.

    In a few Days, I will manage to reach my Level 50 goal before going into Victory Road, so no worries. See you later!
     
    Log #36-Victory Road
  • Ok, so I thought about going to Level 50, but if you are playing a Kanto/Johto Game (or have ever played one), you will remember the amount of grinding you have to do to get levels. I did get to Level 43 before going after the Victory Road...

    The interesting thing about this Victory Road is that, unlike in Generation I or Generation III, in Generations II and IV, the Victory Road has no trainers AT ALL, meaning that if you are going to train, you will be training against wild Pokemon. The only trainer battle is against Silver. I used a video to help me get through, mainly because there are a lot of rocks that could be pushed, and a lot of holes that can be jumped down, so it can be tricky. Sudowoodo was my Strength user, so it was not too bad. Still, don't want to mess up.

    When we were about to leave, Silver came up, intending to beat me. He also claimed to be the reason why there were no trainers in the Victory Road, so whatever lets him feel good about himself. I battled him, and he was an easy fight. His team was between 36 and 40, so if he beat all of the trainers in the Victory Road, what levels were they? Or maybe he just lies. Who knows.

    He opened with Sneasel, which Typlosion OHKOed with Flamethrower. He sent out his ace, Feraligatr, which Ampharos beat, though Feraligatr was a little bit faster, firing off a Waterfall. One Discharge and a Thunder Punch later and it died, and with it went any chance of Silver winning the fight. Next came his Golbat, which Espeon OHKOed. Then was Magneton, which I was unsure who to use, settling on Typhlosion. A Flamethrower OHKO. Next came Haunter, which Sudowoodo OHKOed with Faint Attack. I was surprised by this, since Sudowoodo is slow generally, and it went faster even without the held Quick Claw. Finally, Kadabra was his last effort. I switched to Gyrados. Kadabra set up a Reflect and I used a Bite, which almost OHKOed Kadabra. It was left with a sliver. Instead of attacking me, it used Disable, which blocked Bite. I switched to Ice Fang and Kadabra died.

    Silver was now defeated, and I could move on. He left muttering about what Lance was attempting to teach him. I passed through the Victory Road, healed up, then saved. I will be training up until Level 50 using the Pokemon in the Victory Road (the levels here are Levels 32-35). I will also be getting Dark Pulse and give it to Gyrados in replacement for Bite. Once my team is actually there, I will have the next post, which will be the Elite Four & Champion.

    See you then!
     
    Log #37-Elite Four, First Round
  • Johto Elite Four.jpg

    Here we go! Went in at Level 48, confident that I could have a very effective fight with them. For the most part, it wasn't too bad, but there were some rough patches.

    Will
    The battle with Will wasn't too bad at all. He opened with his first Xatu, and Ampharos OHKOed it. Then came Jynx, who Typhlosion OHKOed. This made me very confident. When his Slowbro came out, I thought Ampharos would be able to OHKO, but Slowbro was bulky, and it took quite a bit to end the fight. Exeggutor was OHKOed. Then came the second Xatu. It refused to go down, hitting Ampharos with Confuse Ray and Psychic, but eventually Ampharos beat it down. One down, 3 (and a Champion) to Go!

    Koga
    It is nice to see Koga move up in the world. First he was a Gym Leader, and now he is an Elite Four member. Good for him. I opened with Typhlosion against his Ariados. OHKO. Next came his Forretress, which blocked my Flamethrower with protect, but then got blasted by another Flamethrower. OHKO. Koga switched strategies, sending out his Muk and I switched to Espeon. Espeon was able to Psybeam and Confusion Muk, even though Muk used Minimize to increase evasion. Crobat went down after using Double Team. OHKO. I switched to Typhlosion against Venomoth. It was an easy OHKO. Two Down, 2 (and a Champion) to Go!

    Bruno
    Bruno was where things started to get tough. He brought out Hitmontop, and I opened with Espeon. Espeon mostly dropped down Hitmontop with Psybeam. Hitmontop changed strategy, Digging down. I switched to Togetic and Togetic brought down Hitmontop. Switching to Gyrados to OHKO Onix, I then switched back to Espeon to take out Hitmonchan and Machamp. Hitmonlee beat down Espeon and Togetic, leaving me with a struggle. Eventually, I used Typhlosion to end that fight. This was starting to make me nervous. Three Down, 1 (and a Champion) to Go!

    Karen
    Karen was very difficult. She opened with Umbreon and I opened with Ampharos, though I considered using Sudowoodo. Umbreon was very dense and hard to take down. She switched to Gengar and I switched to Sudowoodo. Eventually, I beat it down, but it beat Sudowoodo first. Gengar fell to Gyrados, as did Murkrow. Houndoom was tough, taking down three of my Pokemon, but Typlosion beat Houndoom and Vileplume, winning me the battle. I was a bit exhausted from this fight, and I almost withdrew to continue to train. With some nervousness, I continued forward to the Champion.

    Lance_anime.png


    Lance (Champion)
    I opened with Ampharos against Gyrados, though I was considering a Gyrados vs. Gyrados fight. Gyrados was an OHKO. Then came the first Dragonite, where Gyrados managed to beat it. Then came the second Dragonite, though this one beat down Gyrados. Sudowoodo beat it and the third one, though the Dragonites were tough to beat. Next came Aerodactyl, who was beaten by Sudowoodo. Sudowoodo did a lot in this fight. Finally, Charizard took out a few Pokemon, but Espeon ended that fight, winning me the battle.

    I am now the Champion! The Credits rolled, and I am now back in my room. I am going to spend a few days in Johto (namely Cianwood) to get a few Heart Scales and finish my first Blue Card. 30 Blue Card points and I can get Buena's phone number. I might as well, I am at 25 points.

    In the next log, we will start the Kanto end of the quest. Woohoo!
     
    Log #38-Sailing On The S. S. Aqua
  • Woohoo! On to Kanto! Before I went on the S. S. Aqua, I got the National Dex from Professor Oak, then took on the Bug Catching Contest, in an attempt to get a Shiny Stone. Scyther at Full Health is essentially a 100% Win in a Bug Contest. I used Ampharos to paralyze the Scyther, then threw balls until I caught it. Then I crossed my fingers and waited...only to win and get a ... Water Stone. Dang it! I will get it eventually, even if I have to get a box full of Scythers. I also stayed at Cianwood to get a few Heart Scales. I also found some shards and went to the "Shard Guy" in Violet City, getting some berries as a result. I think I know how Whitney got a Lum Berry for her Miltank. Travel to Cianwood, break some rocks, get a ton of Green Shards, and then get a Lum Berry. Who knew?

    SS_Aqua_HGSS.png


    A bit disappointed, yet excited to see what was coming, I decided to go to the S. S. Aqua. I barely got on board when I ran into a well dressed old man who was looking for his granddaughter. I also ran into a sailor who was looking for his sleeping sailor friend. Not even in Kanto and I already had 2 quests. Luckily, both were on the ship. I found the sailor first, then set off to find the little girl. Make Sure to battle all of the trainers! It is worth it!

    Eventually, I found the little girl, who was pestering the Captain. She asked me to play Hide and Seek with her. I eventually found her, and she went back to her grandfather, who was so happy he gave me a Metal Coat. That quest done, I left the S. S. Aqua, arriving at Vermilion City, my first steps in Kanto.

    In the next Log, we will explore Vermilion City, then take on Surge. See you shortly!
     
    Log #39-Lt. Surge
  • Now on land, I wandered through Vermilion City, I checked out the Harbor, the Fan Club, and the Fishing Dude before heading to the Gym. Outside the Gym, there are two ways to get to the front, Cut (through Typhlosion) and Surf (through Gyrados). I used both options. Coming into the Gym, I was told that the trash cans were once shut down, but have since been reinstated. There are 3 trainers here. The first 2 trainers battled me as a Double Battle, then I cleared out the last trainer. BE AWARE THAT IF YOU LEAVE THE GYM AFTER SOLVING THE TRASH CANS, YOU HAVE TO SOLVE IT AGAIN! Do not hesitate to leave and heal up if needed, though. After I opened up the Electric Doors, it was time to take Lt. Surge on!

    1357849-heartgold_soulsilver_lt_surge.png

    Surge comes at you with 5 Pokemon, creating a challenge, with Pokemon between Levels 47 & 53, the highest Pokemon you will have seen up to this point. The dude loves to use Paralysis, so you will be using items in this fight. Typhlosion beat Raichu with Flamethrower, despite the Double Teams. I switched to Sudowoodo to take out the two Electrodes, then switched to Typhlosion for Magneton and Electabuzz. Most of the Pokemon in this fight use Shock Wave, causing a lot of damage. Eventually, Electabuzz fell to Typhlosion, ending the battle with my victory. My first badge of Kanto!

    In the next log, we will head north, since we can't go east due to Snorlax. Heading north, we will get to Saffron City and probably the battle with Sabrina. See you then!
     
    Log #40-Sabrina
  • Traveling north from Vermilion, we came to Saffron City, the largest city of Kanto. There is a bit to do here that we will get to eventually, but as long as there is no Magnet Train, it kinda defeats the purpose to do all of the quests right now. The only one I am focused on right now is beating Sabrina. There are Warp Panels in this Gym, which I absolutely do not like because of how turned around you can get in there. The trainers were not too tough, but having to deal with the Warp Panels and the Trainers can be a hard challenge. There were only 4 Trainers, in all of the corners. It would have been nice to see more trainers in the Gym, especially considering there were empty Gym Rooms.

    Sabrina.jpg


    Eventually, I got to Sabrina. She was sitting on a throne, very fitting for the queen of the psychics. She only has 3 Pokemon in this battle, though can still be tricky. Her Espeon opens this fight, and can really put you in a hard time, being a bit tanky. Espeon is a tough customer due to Skill Swap, which caused issues for my Ampharos. Still, it is beatable. Then comes Mr. Mime. Mr. Mime has the ability to set up barriers, allowing for slowing down damage. Eventually, it beat Ampharos, but Typhlosion Flamethrowered it. Then came her Alakazam, which is still speedy, and has a nice moveset. Alakazam beat my Typhlosion, OHKOed Espeon and Sudowoodo, then lost to my Gyrados. This was a tough battle, and she lives up to her reputation as the toughest Gym Leader in Kanto on average.

    With Saffron City being open in all four directions, I have two options here.

    1. Do the Copycat & Magnet Train Event where Latias becomes unlocked to fly around. Unfortunately, it defeats the point to go to Copycat right now because the Magnet Train is still not working.
    2. Lavender Town, Rock Tunnel, & The Power Plant. I think this is my next best course of action, mainly so we can get the power back on and get things moving in Kanto.


    In the next log, we will go to Lavender Town, explore Rock Tunnel, and get to the Power Plant, exploring there as well. This trek should boost my levels a bit, since I am still at Level 50, and am going to need some opportunities to raise up. Until then, we will see you!
     
    Back
    Top Bottom