• Hey Trainers! Be sure to check out Corsola Beach, our newest section on the forums, in partnership with our friends at Corsola Cove! At the Beach, you can discuss the competitive side of the games, post your favorite Pokemon memes, and connect with other Pokemon creators!
  • Due to the recent changes with Twitter's API, it is no longer possible for Bulbagarden forum users to login via their Twitter account. If you signed up to Bulbagarden via Twitter and do not have another way to login, please contact us here with your Twitter username so that we can get you sorted.

Unovia's Silver Playthrough

Logs #1-#4: New Bark Town to Violet City Gym
  • This Log encompasses the first four Logs I wrote on the road.

    Log # 1
    250px-155Cyndaquil.png

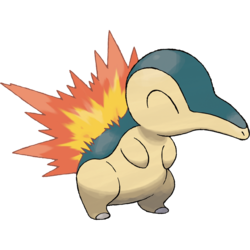
    Welcome to Johto! As the game began, I named myself Ethan and picked my Starter, Cyndaquil, which turned out to be female. Professor Elm asked me to go to Mr. Pokemon and see what his findings were. When I left the Lab, I saw a red haired boy staring in the window. When I tried to talk to him, he pushed me away rather rudely. Afterwards, I talked to my mom, who decided to save me money, and I left to begin my errand. I collected a few berries and a potion or two on my way, eventually arriving at Mr. Pokemon, who was meeting with Professor Oak. Oak gave me a Pokedex, and I also got a mysterious egg. As the quest nearly completed, I ran into the same boy who was earlier looking in the lab, in Cherrygrove City. The guy challenged me to battle. The battle took me a few soft restarts, since the guy, who I named Silver, had his Totodile use Leer, which dropped my stats significantly. After 3 tries, I decided to train my Cyndaquil to Level 6, which gave me Smokescreen. With this success, I beat him, and he ran off. Arriving back at the Lab, I checked in with Elm, who tookm the egg for study, and I got a few Poke balls. With these, I caught a Sentret, Weedle, and later in the day, a Hoothoot. With these captures, I decided to train up to Level 7 before continuing. In the next Log, I will be heading through to my next goal, Violet City. Until the next time, we will see you!

    Log #2
    600px-015Beedrill.png

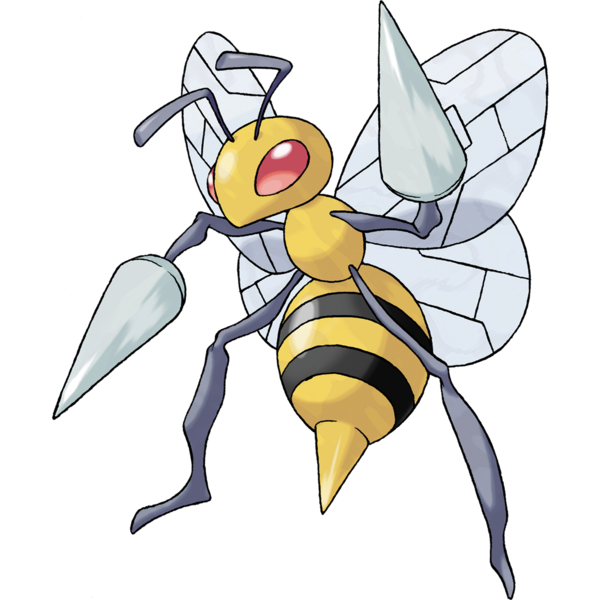
    I got my Weedle up to Kakuna as I began my journey up Route 30. My first few battles were on the two routes between Cherrygrove & Violet. With most of my team at Level 8, I crossed into Violet City, the first major city. Like any good city, there are things for tourists & other people. On the tourism side of life, there is Sprout Tower, while on the Trainer side, there is a Pokemon Gym. I am curious about the type that this Gym is. Before I go take it on, however, I am going to get my team trained to Level 10, then be a tourist for a bit, check out the city. My last responsibility is to go after the Gym. Hopefully I can win my first Badge! In the next Log, we will take on Sprout Tower. Until next time, we will se you!

    Log #3
    Sprout Tower.jpg

    I started this Log by working to finalize the Levels. On Route 31, I surprisingly ran into a Bellsprout, which I captured. But where to train it? On this quest, we backtracked to Route 46, where I ran into Geodude, which I used to train Bellsprout to the rest of my team. Kakuna also got to Beedrill. With my team ready to go, I decided to take on Sprout Tower. This location is, honestly, better at night, due to the presence of Gastly. However, I figured that I would clear out the trainers, or in this case, monks, first. I quickly cleared my way to the top, eventually running into Silver, who had beaten the Elder, but had apparently been cruel to his Pokemon. Silver taunted me, then left. I picked up the escape rope in the corner, then took the Elder on, easily defeating him and getting Flash. I used my escape rope to leave, then came back later that day, catching a Gastly. In the next Log, we will be setting up to battle the first Gym Until next time, we will see you!

    Log #4
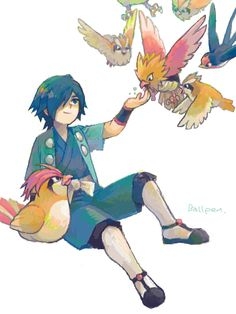
    The next morning, I placed in the box all of my captures except Cyndaquil and Beedrill, my major team members at this point. I finished training in Sprout Tower, healed up, then took the Gym on. The Gym type is Flying. There was no Puzzle, just a snaking path to the Gym Leader. I trained my team using the two trainers, went back to the Pokemon Center to heal, then took on the Gym Leader, Falkner, who had 2 Pokemon, same as me.
    Falkner.jpg


    He opened with Pidgey, while I sent out Beedrill. Now, you might wonder why I sent out Beedrill, a Bug and Poison type, against a Flying type? It was to measure out to see Falkner's strength and to save Cyndaquil for the next Pokemon. Beedrill used Fury Attack to quickly end Pidgey. Next came his ace, Pidgeotto. I switched to Cyndaquil. We exchanged Ember & Gust attacks, and Cyndaquil came out on top. I won the first badge!

    Afterwards, I got a call from Professor Elm, who contacted me about the Egg. He wanted me to meet up with his aide to take care of the egg. In the next Log, we will collect it then work to move on to the next destination. Until next time, we will see you!

    Note: The next Log will start at Log #5.
     
    Log #5-Completing Research for Elm
  • After I beat Falkner, I got the phone call from Elm. He talked about his aide wanting to give me the egg. The egg was apparently close to hatching. I traveled south on Route 32 a bit, catching a Mareep and a Wooper. Shortly after, the egg hatched into a Togepi.

    175Togepi_SM_anime.png


    In Gen IV, having Togekiss is an amazing team member. However, in Gen II, Togetic is almost a waste of a team member. As soon as Togepi hatched, I called Elm to let him know that it hatched, and he asked me to go back to him and show it off. With my next quest defined, I started on my journey back. While I was heading back, I decided to train my Wooper and Mareep. Wooper was Level 4 when I caught it, so I headed back to Route 46 to train against the Geodudes. I eventually got Wooper to Level 9. Then I focused on training Mareep to Level 9 around Cherrygrove City, where Mareep got Thundershock.

    With my Pokemon ready, I finally came back to New Bark Town and showed Togepi to Elm, who was ecstatic and gave me an Everstone. I don't plan on training Togepi, so when I got back to Cherrygrove City, I put Togepi in the box, bringing out my Bellsprout in its place. Going north from Cherrygrove, I found my way back to Violet City, then traveled through Route 32, battling some trainers and collecting items. I healed up my team in the Pokemon Center near Union Cave.

    I have two options. First, I could go over the bridge and complete the Route, or second, I could go into Union Cave. In the next Log, I will complete Route 32 and go through Union Cave. Until the next time, we will see you!
     
    Log #6-Route 32 & Union Cave
  • Before I went into Union Cave, I decided to finish my exploration of Route 32. I defeated the fishermen on the plank bridge, then made sure to clear the rest of the route. I then traveled back toward Union Cave, making sure to heal before going inside. Once I got to Union Cave, I found and captured a Zubat. The Zubat is going to eventually be a Crobat as part of my team. I completed my trek through the Cave, arriving on the other side. There were a lot of hikers in the cave, and even one on the outside. SO MANY HIKERS!

    Upon arriving in Azalea Town, I saw a guy in a dark suit blocking access to a well and to the Pokemon Gym as well. It looks like I won't be battling there for a while. Don't know why the Gym Leader has not chased these guys out of the town yet...

    Before I really get settled in here, though, I decided to go back and train my Zubat, healing up in the Pokemon Center, then depositing a few Pokemon in the PC. Zubat will eventually replace Hoothoot. It will take a little bit, but I think I will head into battle once Zubat gets to Level 12 (It's Level 9 right now).

    In the next Log, we will fully check out Azalea Town and hopefully get to free that Well. Until next time, we will see you!
     
    Log #7-Slowpoke Well
  • I got my Zubat to Level 12, then decided to go back to Azalea Town to heal up. Once I healed, I decided to trigger the events of Slowpoke Well. First, I got Kurt to rush the Team Rocket grunt. Then I came down with him, checking his injuries. Leaving him behind, I used the Rocket grunts as solid training.

    319px-HeartGold_SoulSilver_Proton.png

    In Gen II, there are no named Admins. In Gen IV, the Admin in the Slowpoke Well was Proton. With me being Level 12 & 13, I was a bit weaker than I would have been in Gen IV. The Admin. wasn't that strong, only being Level 14, but they did stall out things for a little bit. After I cleared out the Rockets out, Kurt healed me up and offtered to make some Poke Balls out of the Apricorns. In Gen II, the Pokeball production is a lot slower (one ball per day).

    079Slowpoke_OS_anime_2.png

    I decided to train up a bit, since my next two fights are coming up. There is Silver and the battle against Bugsy. Considering the challenge I had against the Rockets, I want to get my team up to Level 16 before the next battles. While I was in Slowpoke Well, I figured I might as well catch one. Took me a bit but I did. In the next Log, we will battle Silver and Bugsy. Until next time, we will see you!
     
    Log #8-Azalea Gym
  • At Level 14, I decided to take on Silver first, since in this game, his strongest Pokemon is Level 16, comparable to Bugsy. He sent out Gastly (Level 12) and I sent out Quilava, who evolved after I did some training in Slowpoke Well. Two Ember attacks took out Gastly, and, as he prepared to switch to Croconaw, I switched to Mareep. Two Thundershocks later and the croc was down. Mareep grew to Level 15, ready to evolve. Finally, Silver sent out Zubat (Level 14). Quilava defeated Zubat, winning me the battle. Mareep evolved to Flaaffy as Silver ran off.

    Bugsy.png


    Walking into Azalea Gym, it was not too difficult to beat the trainers. Unlike in Gen IV, where there was an actual puzzle, in Gen II, the only challenge is to find an easy way to the middle of the room, where Bugsy waits. Eventually I got to Bugsy, and we began the battle. Zubat took down Metapod (Level 14) using Bite. Once Scyther (Level 16) showed up, I tried to use Zubat, but one Fury Cutter almost took Zubat down, so I changed to Quilava, which took down Scyther in two hits. I won the second badge.

    In the next Log, we will go explore Ilex Forest and the nearby route. Until then, we will see you.
     
    Log #9-Ilex Forest & Route 34
  • I explored Ilex Forest at night, which kinda made it spooky. Still, I did not intend to catch anything in the forest, though I did see the Headbutt tutor, which I intended to give to my Slowpoke (I didn't have it on me at the time), so I plan to go back for it soon. After I got through the forest, I faced trainers on Route 34. I found myself quite a bit challenged by the trainers here, especially the police officer (who you can only battle at night), since he had a Growlithe (Level 17). I ended up fighting him with Beedrill at Level 16. Somehow I edged it out. Am a bit disappointed with the slowness of Wooper, who should have done more.

    I beat Camper Todd with barely any team members left, crossing into Goldenrod. Healing quickly, I decided to go get the trade Machop, because without it I have no plan against Whitney. How would I get it? I had to catch a Drowzee.

    451px-096Drowzee_AG_anime.png


    Luckily Drowzee was not too hard to find, and I had a Great Ball, my last ball I had in my pack. It was an easy capture, and I quickly ran to the Department Store to do the trade, getting a Level 10 Machop in return. All I have to do now is to train the Machop to Level 16 and then my whole team to Level 23. Shouldn't take me too long. In the next Log, we will discuss going through the National Park to train against Whitney, and probably battle Whitney as well.

    The demonic cow awaits.
    581px-241Miltank_OS_anime.png


    Until the next time, we will see you!
     
    Log #10-National Park & Goldenrod Gym
  • Because the Pokemon on Route 34 (especially the area just south of Goldenrod) are anywhere from Levels 10-13, this was a great spot to train up, so I took my time and did so, getting up to Level 18 before deciding to go to the National Park. Zubat did well during training, since most of the encounters were Drowzee (My Zubat has Bite). With training there done, I headed to the National Park, battling all of the nearby trainers, both inside the park as well as outside the park in both directions. It was pretty solid training, but I decided to round out my training by going back to the grass on Route 34. Wooper evolved to Quagsire in this process. I also collected my Bike at this time.

    Whitney.jpg


    Once I got to Level 20, my thoughts turned to the next Gym fight, and I decided to try out the Gym and if I didn't do well against the trainers, I would retreat and try again. Surprisingly, I did very well, given the Clefairy maze, with the trainers, eventually getting Quilava to Level 21. It made me think about Flame Wheel, specifically when Quilava learns it (Just looked it up, Level 31...OMG!!!), since the speed boost would really help. At Level 20, Beedrill learned Twineedle, which is a multiple strike move that can poison the target Pokemon (this knowledge comes in handy potentially later).

    I bested the trainers, but could I beat Whitney? Only one way to find out, and that's to battle her! Opening with Beedrill (Level 20, almost 21) against her Clefairy (Level 18), I focused on using Twineedle, hoping for a Poison, which didn't happen. Clefairy Metronomed Guillotine, which did nothing to me thankfully. Two uses of Twineedle ended Clefairy, but as Miltank came out, I asked myself if Beedrill should stay in. Miltank has the moves Stomp, Attract, Milk Drink, and Rollout, a truly devastating move, and the one I feared the most, since it is a Rock Type move. I had two options.

    Option 1: Keep a fully healthy Beedrill in, keep using Twineedle, hope for a Poisoning, and risk a Rollout, which would destroy Beedrill.
    Option 2: Switch to Machop and let it complete the battle.

    Going to Option 2, I switched out to Machop, not wanting to risk it. Machop had recently learned Seismic Toss, so I thought it would be effective against Miltank, due to Miltank's weight. Unfortunately, it didn't do too much damage, and Miltank began to Rollout, which has a cumulative effect. Knowing I had limited time, I switched strategies, using Low Kick. That easily took out Miltank before the stall outs could begin, winning me the badge.

    Now with 3 Badges in the case, it begs the question of what to do now. I know there is that strange tree (Sudowoodo), but I don't have the squirtbottle yet or any Great Balls (I want to catch Sudowoodo for my full Team which will eventually be replaced with Donphan), and there are a few things to do in the next city (Ecruteak), so in the next Log, we will catch Sudowoodo. Until next time, we will see you!
     
    Log #11-Sudowoodo & Bill
  • Biking through Goldenrod City, I eventually found the house that had the Squirtbottle. Before I decided to go after the "Shaking Tree of Route 36", I went to get some Great Balls, since I had none, and I had intention to catch the tree. After a little shopping, I biked to the Route and sprayed the tree. The battle was on!

    600px-185Sudowoodo.png

    I brought out Quagsire to battle Sudowoodo (Level 20), though I worried that Sudowoodo would die quickly in an OHKO. Luckily, the Water Gun only dropped Sudowoodo enough (into the yellow) so I could spend some time catching it. It went into the 2nd Great Ball (I had 5), giving me another team member when I was ready. It will replace Machop. With Sudowoodo out of the way and safely in my box, I headed into Ecruteak to heal.

    166px-FireRed_LeafGreen_Bill.png

    In the Ecruteak City Pokemon Center, I ran into a man named Bill, who was working on his "Time Capsules". The time capsule feature allows transfer of Generation 1 Pokemon and moves from Generation II Johto (and Kanto) to Generation I Kanto. It's not a feature I am going to use. If I were to follow Bill to Goldenrod, I would be able to get an Eevee from him. In the next Log, I will be getting that Eevee, then go to the Ecruteak Dance Theater. Until the next time, we will see you!
     
    Log #12-Eevee, The Burned Tower, &The Kimono Girls
  • In Ecruteak City, I switched out Machop for Sudowoodo. Then, I decided to train Sudowoodo to match the rest of my team. As the whole group crossed Level 23, my Golbat did not yet evolve into Crobat. I am sure it will soon. Once I felt trained, I headed south to Goldenrod City, where Bill had a gift for me.

    166px-FireRed_LeafGreen_Bill.png


    He gave me an Eevee, hoping I would raise it out in nature. Let's consider the options I could see in Johto, though for right now, I put it in the box.

    Eeveelutions.png

    (Ignore Glaceon, Leafeon, & Sylveon, since they did not exist in Generation II)

    Eevee is a major question mark. To turn it into Jolteon, Vaporeon, & Flareon would be a waste of an Eevee in this game, especially because getting the stones are pretty difficult to do. That leaves Espeon & Umbreon. Of the two, I really like Espeon more, but the problem is that the Happiness standard is not clear cut in Gen II Johto. There is no soothe bell (that would not be introduced until Generation III), and the only real way to get the happiness up is the Haircut Bros. method. Even so, it can take a LONG time to get the haircuts to work in this Gen. Would LOVE to use Espeon, but for this Run, I am not going to use Eevee. Maybe if I replay Gen IV at another time...

    Burned_Tower_EP181.png


    Feeling ready to continue to the next step, I traveled to the Burned Tower. Be Warned! As soon as you enter the Burned Tower, Silver will battle you!

    He opened with Haunter (Level 20), and I opened with Quilava (Level 23), not sure of what Pokemon he would start out with. I used Quilava, using Ember. Haunter tried to curse me, but all that did was lower its HP. Quilava ended up defeating Haunter. Croconaw (Level 22) came out next, and I switched to Flaaffy (Level 23). Croconaw tried to stall out Flaaffy with Leer, and I used Thunderwave to paralyze and Thundershock to OHKO Croconaw. He switched to Magnemite (Level 18) and I switched back to Quilava. One Ember ended Magnemite. Down to his last Pokemon, Silver sent out Zubat (Level 20). Looking for an honor battle, I sent out Golbat, which easily took out Zubat. Silver claimed that he would get the favoritism of the Legendary Pokemon that are there (the Beasts are in the lower level of the tower).

    I am not going to unleash them until probably I am ready to go after Clair, since they are Level 40.

    With Silver defeated, and my business at Burned Tower done (right now), I headed to the Ecruteak Dance Theater, where there were 5 girls in Kimonos.

    Kimono_sisters.png


    Now was the time to battle them! Unlike in Generation IV, when you battle the Kimono Girls back to back, in Generation II, you battle each one individually. Still, it is recommended that you save after each battle, since it is hard to know what each one uses. They are all Level 17.

    Battle I: Flareon
    Quagsire defeated Flareon using Water Gun, and while Flareon had Ember, it didn't use it, instead sticking to Tail Whip & Sand Attack. In 2 attacks, Quagsire took Flareon out.

    Battle II: Espeon
    Next, Golbat was used against Espeon. Espeon was a bit of a problem, and I had Beedrill to back up Golbat. Espeon used Confusion, which did about half damage to Golbat, yet Golbat held on, doing 2 Bites to end Espeon.

    Battle III: Umbreon
    Umbreon was going to be tricky. I opened with Sudowoodo, who had Low Kick. Umbreon used several Pursuit attacks, and was a defensive tank. Eventually, Umbreon fell.

    Battle IV: Vaporeon
    I switched to Flaaffy for this fight. Vaporeon was a bit like Espeon due to the fact it would use elemental attacks instead of stat drops. Vaporeon used Water Gun against Flaaffy. I had Flaaffy use Thunderwave to paralyze at first, and two Thundershocks ended Vaporeon.

    Battle V: Jolteon
    The last battle was against Jolteon. I switched back to Quagsire for this fight. Jolteon used a lot of Sand Attacks, which limited the effectiveness of Slam. Eventually, one Slam OHKOed Jolteon, ending the fight.

    Leaving the stage, I collected Surf from the Rhydon owning gentleman, and I departed. In the next Log, we will go battle Morty for the next badge. We will take some time to finish training (I want to go between Levels 25 & 28), then it's battle time.

    Until next time, we will see you!
     
    Log #13-Ecruteak Gym
  • I decided to use my Golbat as the gauge for my levels to set up for Morty, since I was trying to get it to become a Crobat. Unfortunately, even by Level 28 (what I had as my Level Cap for Morty) it had not evolved yet (and still has not).

    Burned_Tower_EP181.png


    Initially, I traveled to the Burned Tower, training in one of the basement level for a bit. Eventually I got tired of training there, and kinda curious, I traveled west onto Routes 38, 39, & 40 (on Route 39, there is a farm. I may stop them soon.) battling trainers and getting to Olivine City. Running into Silver, he told me that the Gym Leader was taking care of a sick Pokemon, all while slamming them for "being weak for taking care of a sick Pokemon." Silver also "encouraged" me to go train at the Olivine Lighthouse. With not too much else to do, and needing a new training spot other than in the wild, I headed there.

    Glitter Lighthouse.jpg


    There were quite a few trainers here, allowing me to do a bit of training. There are 12 trainers here, allowing a good challenge. I cleared it out, and still needing a bit of training, I finished up back in the Burned Tower. My entire team was Level 28 (except for Quagsire, who was Level 25), and I wanted to battle Morty at night (thought it would be cool). Feeling ready, I headed to the Gym.

    Morty.jpg


    The Gym Puzzle is a tricky one, being a pit of darkness that apparently has a walking path through it. This can be challenging if you can't figure out the trick (walk up to each trainer, there are four, and zigzag that way across the floor). I used Quagsire to clear the trainers and train up a bit. I got to Morty, changing over to Golbat to actually battle the man himself. He opened with Gastly (Level 21). One Bite OHKO. Next came his first Haunter (Level 21). One Bite OHKO. Surprisingly, he sent out his big bad Gengar (Level 25), and a single Bite OHKo ended it. He finished with his last Haunter (Level 23), who only managed a Spite before it fell after 2 hits. Morty was done. I have always been a bit disappointed in this fight. No Misdreaveus? Really? No Johto representation...shame.

    With Morty done, I have 3 Gyms opened to me. These are Chuck, Jasmine, and Pryce. I have 2 options:
    Option 1: Go across the sea and take out Chuck and Jasmine, then go back for Pryce.
    Option 2: Go Pryce, then Chuck and Jasmine.


    I am leaning toward Option 2, since that will allow me to get the Red Gyarados earlier. In the next Log, we will go to the Miltank Farm, healing up the sick Miltank, then go to Route 42 & Mahogany Town. Until the next time, we will see you!
     
    Log #14-Route 42, Mahogany Town, The Lake of Rage, & Team Rocket HQ
  • This posting is going to be completely PACKED, as I did a LOT for this post. I am going to give this 3 Headings!

    Route 42 & Mahogany Town

    I was originally going to do the Miltank side quest, but that literally takes a week, and I was on a roll, so I decided to move on, then go back. Heading east from Ecruteak to Route 42, there wasn't much here, though I did collect some items and fight some trainers. The entrance to Mt. Mortar is here as well, but I decided to skip it for now. I gave Quagsire Surf, then sailed across the pools of water, eventually arriving in Mahogany Town. Mahogany is a small town, but it is a crossroads. After I healed, I prepared to travel north onto Route 43, the end of which was the Lake of Rage. There are two pathways, and a lot of cuttable trees (thank goodness I gave Beedrill Cut a long time ago, back in the Ilex Forest). I explored the whole area, making sure I battled all of the trainers for the experience. Eventually, I found myself on the banks of the Lake of Rage.

    Lake of Rage
    This lake is MASSIVE, so massive you can't see the other side easily. Setting up Quagsire to Surf and putting Flaaffy as my lead, I sailed into the lake, eventually running into the Red Gyarados (Level 30).
    Lake of Rage.jpg

    Engaging in the battle, Flaaffy used Thunderwave, paralyzing the beast. Gyarados used Dragon Rage, causing Flaaffy some damage. Hanging in there, Flaaffy used Thundershock, which lowered the HP down to a sliver. I almost saw it faint! I had an Ultra Ball, found during my excursion on Route 42 which I used to capture it. The beast was mine! I also collected the Red Scale for a later exchange with Mr. Pokemon (once I can Fly). Sailing back across the lake, I ran into a man in a cape who called himself Lance.
    Lance_anime.png

    He applauded me for catching the Gyarados, then asked me to go with him to the location where the signal came from in Mahogany Town. Since I couldn't Fly, I had to steadily bike back. Taking the opportunity to heal again and clear my bag a bit, I set to meet up with Lance.

    Team Rocket HQ
    Walking into the Souvenir Shop, I see Lance's Dragonite literally Hyperbeaming the shopkeeper (how did that get allowed???). Lance pulled me into his quest, and we worked together to clear out the base.
    220px-Mahogany_Town_PG.png
    220px-Team_Rocket_HQ_PG.png
    There are a lot of grunts and scientists here, and it was here that Flaaffy became Ampharos. Golbat has not yet, however. No worries. I cleared out the executives, captured one of the Electrodes, and ended Team Rocket here. Lance gave me Whirlpool, then departed, leaving me with a very weak team. I traveled back to Ecruteak City, sold some useless items, and healed.

    In the next Log, I am planning to go do the Sick Miltank Subquest, do some training, and prepare to take on Pryce. Until the next time, we will see you!
     
    Playthrough Announcement!
  • Right now, because I am doing the "Sick Miltank" Subquest, and it takes so long to do (can only pick one berry a day), I am having to wait. I am currently camped out at Route 38, as it is one of the few places in Johto where you can get the berries needed.

    Due to the wait, I decided to start up the "Pokemon Red Origins Run". I will be posting the Origins Run Rules shortly.
     
    Pokemon Red "Origins" Run
  •  
    Log #15-The Sick Miltank
  • 581px-241Miltank_OS_anime.png


    Man, this took a long time! In the Generation IV games (HGSS), there are Oran Berries, but in Generation II, there is the standard Berry, which does the same thing. You need 7 Berries to heal the sick Miltank. I had 2 before I had to camp out to get more. The link below will show you where you can get more:


    Luckily for me, one of the Berry trees was outside the Miltank Farm, on Route 38, so I would camp there, get a Berry (one a day), rush to the farm, feed it to Miltank, then camp back at the tree. Repeat for a few days. It was slow, but eventually I got it all done, healing Miltank fully. What did I get? A single bottle of Moo Moo Milk. I hope I could get one per day, because for the amount of work required, it really doesn't pay.

    In the next Log, we will take on Pryce. Until the next time, we will see you!
     
    Log #16-Mahogany Town Gym
  • To prepare for Pryce, I headed north to Route 43, which has a lot of higher Level Pokemon and a fantastic place to set my training. It didn't take me too long, and I set myself to Level 31 so that Quilava would have Flame Wheel, which is far stronger than Ember. I didn't want to grind up too much beyond that, since I knew what my team for be against Pryce.. I had Quilava, Ampharos, & Sudowoodo, three points in a good set up for the Ice Type. Quilava offered Fire Type moves, Ampharos would be good for any Pokemon that are part Water Type (like Seel and Dewgong), and Sudowoodo had Rock & Fighting moves. Gyarados had Surf, which could be used against any Ground Types (Like Swinub & Piloswine). I was really balanced.

    The ice sliding puzzle was very difficult, and I had to get a guide to help. I used:

    The trainers, by contrast, were not as difficult. Once I was in front of Pryce (at Level 32 from all of the trainers), I took him on.

    Pryce.jpg


    Normally I would take on Pryce as the 7th Gym Leader, where I would be a bit higher than I was (likely in the mid 30's). Pryce opened with Seel (Level 27) and I opened with Ampharos (Level 31). One Thunderpunch took it out. Next came Piloswine (Level 31), and I changed to Sudowoodo (Level 31), thinking that maybe a combination of Rock and Fighting moves would take it out, which, while that was largely true, Piloswine was bulky, and managed to freeze Sudowoodo. Switching strategies, I changed to Gyarados (Level 31) and I focused on using Surf. Ploswine managed to freeze Gyarados. Here it was, I had 2 frozen Pokemon, and I was unsure of what I wanted to do. Keeping Gyarados out, I decided to let the ice thaw, which it eventually did. I finished Piloswine off, and seeing Gyarados significantly weakened, I changed back to Ampharos while Pryce changed to Dewgong (Level 29). One Thunderpunch ended Dewgong quickly.

    With Pryce defeated, I have 5 Badges. In the next Log, we plan to go back to Glitter Lighthouse and finish that. Until next time, we will see you!
     
    Log #17-Meeting With Jasmine
  • Glitter Lighthouse.jpg


    Leaving Mahogany Town, I headed west to Ecruteak City, then west and south to Olivine City. Coming back into the Glitter Lighthouse, I worked my way to Jasmine, battling a few trainers that I had missed before, finally arriving at where Jasmine and Amphy, the lighthouse Pokemon, were.

    Jasmine & Amphy.png


    Amphy is very sick, and Jasmine requested my help to get Amphy some medicine in Cianwood City. In the next Log, we will be heading to Cianwood City. Until the next time, we will see you!
     
    Log #18-The Quest for the Secretpotion
  • Before I left for Cianwood, I made sure to train up Machop to Machoke for the use of strength, thinking ahead to the Gym Battle with Chuck, who requires the use of strength for the puzzle. It was easy to level up, due to being a traded Pokemon. I placed it back in the box, getting out Sudowoodo again. Thus began to journey to Cianwood.

    Whirl Islands.jpg


    Routes 40 & 41 also are home to the Whirl Islands, but right now, the mysteries in these islands are not interesting me yet. It was rather straight forward getting to Cianwood (pretty much go as far south and west as you can) and you will be able to get there. My Golbat FINALLY EVOLVED at Level 32! Once I got to Cianwood, I healed (there are a bunch of trainers here), then checked out the island. Took me a bit, but I found the house (that would be a pharmacy building in Gen IV) that I could find the Secret Potion. I also found Strength after some searching here. There was also another request here...protecting Shuckie.

    213Shuckle_OS_anime.png


    Shuckie the Shuckle was being protected by its trainer after Silver apparently stole a Pokemon from him (I think in Gen IV, it was mentioned that the other Pokemon was a Sneasel). I took Shuckie back to Olivine, then back to Cianwood.


    Glitter Lighthouse.jpg
    Jasmine & Amphy.png

    Once again returning to Olivine, I immediately went back to the Lighthouse, eventually able to give the Secret Potion to Jasmine. She healed Amphy, then went back to the Gym. I checked in with Amphy, who was grateful, then departed the Lighthouse and headed back to Cianwood. In the next Log, we are going to do back to back Gyms. That's right. It's Gym time against Chuck & Jasmine. Until the next time, we will see you!
     
    Log #19-Cianwood & Olivine Gyms
  • Chuck.jpg
    Jasmine.jpg

    Cianwood Gym
    The Gym was kinda tricky, since I didn't know what level the trainers would be. They were good training, that's for sure. It was a good thing I brought Machoke, since he could use Strength and that was needed for this puzzle. Honestly, I liked the creativity of the Gen IV one better.

    When I got to Chuck, it was not difficult at all. He opened with Primeape (Level 27) and I opened with Crobat (Level 32). One Wing Attack was an OHKO. He switched to Poliwrath (Level 30) and I switched to Ampharos (Level 33). Ampharos hit Poliwrath with Thunderwave to make sure it was paralyzed and therefore even slower. Poliwrath tried to use Hypnosis, and when that failed, I knew I had this fight in the bag. One Thunderpunch got me an OHKO.

    Chuck was done. I got the badge and Fly, taught it to Crobat, then flew to Olivine.

    Olivine Gym
    No trainers, just Jasmine. She opened with her first Magnemite (Level 30), and I opened with Sudowoodo (Level 32), who I had exchanged with Machoke before for Cianwood. The Magnemite was tricky, able to hit me with Thunderbolt after barely surviving a Low Kick. One more Low Kick took out Magnemite, but Sudowoodo was in bad shape. When Steelix (Level 35) came out, I changed out to Quilava (Level 33). I expected an OHKO from Flame Wheel, but when Steelix survived and struck back with a Rock Throw, I was in a bit of trouble. Quilava was barely hanging on, but one more Flame Wheel ended that fight. She sent out her next Magnemite (Level 30) and I came back to a almost defeated Sudowoodo. Sudowoodo managed to hit with another Low Kick, which once again almost took out Magnemite, but Magnemite almost took out Sudowoodo with Thunderbolt.

    I was hard pressed. Both Quilava and Sudowoodo were very weak, almost out, and I didn't know what to do. Most of my other Pokemon were weak to Electric moves, except Ampharos (Level 33), which I used to finish the Magnemite with a single Thunderpunch, winning me the badge.

    As I left the Gym, Professor Elm called me, talking about strange transmissions on the radio. I listened myself, and it was Team Rocket, reporting from Goldenrod. Apparently, they wanted Giovanni to come back. Not. Gonna. Happen. Determined to root them out, I flew to Goldenrod. In the next Log, we will clear out the Radio Tower. Until the next time, we will see you!
     
    Log #20-Clearing the Rockets Out
  • The removal of the Rockets occurs in two different locations: The Goldenrod Radio Tower & Goldenrod Tunnel.

    Goldenrod Radio Tower
    There are 8 Grunts & 2 Scientists in the area before the Card Key. Once I cleared them out, I was given directions to go to the Goldenrod Tunnel, and given a key to do so.

    Goldenrod Tunnel
    In the Goldenrod Tunnel, I ran into Silver, who challenged me to battle! He opened with Golbat (Level 30) and I opened with Ampharos (Level 34). Golbat confused Ampharos, but Ampharos managed to OHKO with a Thunderpunch. Magnemite (Level 28) fell to Sudowoodo (Level 33) after a brief struggle. Next for Silver was Feraligatr (Level 32) and I was uncertain of what to do next, but I eventually sent out Beedrill (Level 34), who effectively (yet slowly) defeated the starter with Twineedle, at one point poisoning him. Probably if Feraligatr had Ice moves, I would not have been able to do that, but still.

    Haunter (Level 30) fell to Crobat (Level 33) and Sneasel (Level 32) went down to Beedrill. After the fight, it seemed that Silver was starting to reevaluate his life. Once Silver departed, I was left to defeat the rest of the Team Rocket grunts and the assorted people. Once I was done in the Tunnel, I got the Card Key, where I could go back to the Tower and finish this. All that was really left was beating the Executives.

    Petrel.jpg

    Petrel (Gen 4)
    Ariana.png

    Ariana (Gen 4)
    Archer.jpg

    Archer (Gen 4)

    In Generation IV, the executives were different, with names and the like. In Generation II, they were just under the title of Executive. Even though they were on average a few levels higher, I could hold my own against them. Beedrill was relly good at points here, especially on the one that would become Archer. I was a bit surprised, considering Archer had Houndour and Houndoom. Ariana gave me the most problems, since she had an Arbok, which I had no major way to attack. It was slow, but they all fell.

    With Team Rocket gone, I freed up Goldenrod, and all of Johto, from Team Rocket's terror. The Radio Director gave me the Silver Wing so I could go to the Whirl Islands & get Lugia. Once I left the Radio Tower, I flew to Cherrygrove City and exchanged my Red Scale for the EXP. Share. In the next Log, we will travel through Ice Path on our way to Blackthorn City. Until next time, we will see you!
     
    Log #21-Ice Path
  • It's been a bit since we last played on Silver, but when we last left our hero, he was about to take on the Ice Path. Ice Path is a bit of a challenge. Going into Ice Path, there are Strength Boulders, so I had to switch out my Sudowoodo for my Machoke, since it had Strength. It was very difficult to go through, and I tried following written instructions, which I was able to understand until the Strength Puzzles, which then lead me to a Youtube Video.


    There were only 2 items of importance here, a Nevermeltice and HM07 Waterfall. Following the videos, I exited in Blackthorn City, then in the Pokemon Center, I returned Sudowoodo back into the team, dropping Machoke. In the next Log, we will go onto Route 45, where we plan to catch our Phanpy, our final team member, which will eventually replace Sudowoodo. Until the next time, we will see you!
     
    Back
    Top Bottom